
Making your own nut milk: an easy step-by-step guide
(Credits)
If you’re like the rest of the consumers across the globe, you’re probably drinking less cow milk, and more alternative milks such as cashew milk and almond milk. The next thing to do is to go a step further, and make your own nut milk at home instead of drinking store-bought ones. Why is homemade nut milk better, and how do you make your own nut milks? In this article, we’ll cover all that, and more!
We already know the benefits of nut milk over cow’s milk. Studies have shown that 92.3% of Chinese participants and up to 90% of East Asian individuals are lactose intolerant - so rather than drink cow’s milk and suffer the consequences, it makes much more sense for us to consume nut milks which doesn’t make us feel ill.
Why is homemade nut milk better than store-bought ones?
Whilst nut milk might be a preferable option for many Asians, it doesn’t mean that it’s the holy grail of beverages. There are plenty of issues that experts have raised with store-bought nut milk - such that brands are increasingly reducing the content of nuts in their milk, and replacing them with cheaper fillers and thickeners.
 (Credits)
For example, the seaweed-based Carageenan is a common addictive which is used to stabilize and thicken dairy-free milks. Whilst seaweed sounds fairly innocuous, those who have digestive tract issues will do well to steer clear of Carageenan, as this additive has been shown to be inflammatory in several studies.
In a nutshell: because nuts are expensive, manufacturers are going all out to skimp on the nut content in nut milks. In fact, most brands of nut milk are only made up of between 1% to 6% nuts. Bearing this in mind, many consumers are choosing to forego the store-bought nut milks altogether, and simply make their own milks at home.
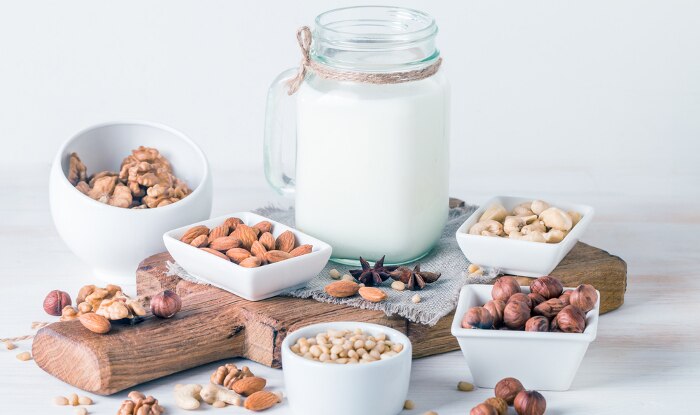
Is it difficult to make nut milk at home?
Quite the contrary! You’ll need to purchase an inexpensive nut milk bag to use, but apart from that, you should have all the other equipment (bowls, a strainer, a measuring cup, and a blender) you need in your kitchen.
(Credits)
For example, the seaweed-based Carageenan is a common addictive which is used to stabilize and thicken dairy-free milks. Whilst seaweed sounds fairly innocuous, those who have digestive tract issues will do well to steer clear of Carageenan, as this additive has been shown to be inflammatory in several studies.
In a nutshell: because nuts are expensive, manufacturers are going all out to skimp on the nut content in nut milks. In fact, most brands of nut milk are only made up of between 1% to 6% nuts. Bearing this in mind, many consumers are choosing to forego the store-bought nut milks altogether, and simply make their own milks at home.
Is it difficult to make nut milk at home?
Quite the contrary! You’ll need to purchase an inexpensive nut milk bag to use, but apart from that, you should have all the other equipment (bowls, a strainer, a measuring cup, and a blender) you need in your kitchen.
 (Credits)
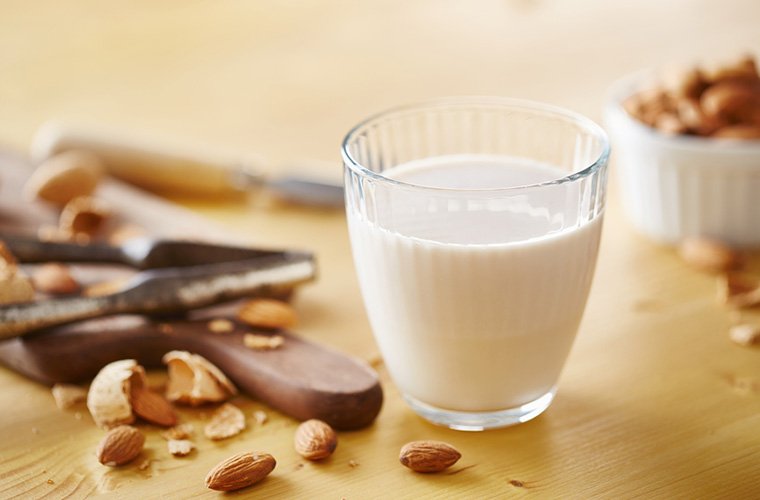
How do I make nut milk at home?
Step #1: Soak your nuts overnight. Place them in a bowl and cover them with an inch of water - you can either leave this bowl to stand on the counter (covered with a cloth!), or in the refrigerator.
Step #2: Drain and rinse your nuts.
Step #3: Combine one part almonds and two parts water in a blender, and blend at the highest speed for two minutes. Be sure to pulse the blender (instead of simply blending continuously), so that you break up the nuts properly.
Step #4: Strain the mixture to get the almond milk out.
Step #5: Deposit the blended nuts into the nut bag, and twist and squeeze it such that you extract all the remaining milk.
Step #6: Sweeten to taste with honey, maple syrup, or other sweeteners.
Step #7: Put the leftover blended nuts aside - these can be added to your morning smoothies, or your baked goods.
Step #8: Enjoy your freshly made, all-natural nut milk!
(Credits)
How do I make nut milk at home?
Step #1: Soak your nuts overnight. Place them in a bowl and cover them with an inch of water - you can either leave this bowl to stand on the counter (covered with a cloth!), or in the refrigerator.
Step #2: Drain and rinse your nuts.
Step #3: Combine one part almonds and two parts water in a blender, and blend at the highest speed for two minutes. Be sure to pulse the blender (instead of simply blending continuously), so that you break up the nuts properly.
Step #4: Strain the mixture to get the almond milk out.
Step #5: Deposit the blended nuts into the nut bag, and twist and squeeze it such that you extract all the remaining milk.
Step #6: Sweeten to taste with honey, maple syrup, or other sweeteners.
Step #7: Put the leftover blended nuts aside - these can be added to your morning smoothies, or your baked goods.
Step #8: Enjoy your freshly made, all-natural nut milk!
 (Credits)
For example, the seaweed-based Carageenan is a common addictive which is used to stabilize and thicken dairy-free milks. Whilst seaweed sounds fairly innocuous, those who have digestive tract issues will do well to steer clear of Carageenan, as this additive has been shown to be inflammatory in several studies.
In a nutshell: because nuts are expensive, manufacturers are going all out to skimp on the nut content in nut milks. In fact, most brands of nut milk are only made up of between 1% to 6% nuts. Bearing this in mind, many consumers are choosing to forego the store-bought nut milks altogether, and simply make their own milks at home.
Is it difficult to make nut milk at home?
Quite the contrary! You’ll need to purchase an inexpensive nut milk bag to use, but apart from that, you should have all the other equipment (bowls, a strainer, a measuring cup, and a blender) you need in your kitchen.
(Credits)
For example, the seaweed-based Carageenan is a common addictive which is used to stabilize and thicken dairy-free milks. Whilst seaweed sounds fairly innocuous, those who have digestive tract issues will do well to steer clear of Carageenan, as this additive has been shown to be inflammatory in several studies.
In a nutshell: because nuts are expensive, manufacturers are going all out to skimp on the nut content in nut milks. In fact, most brands of nut milk are only made up of between 1% to 6% nuts. Bearing this in mind, many consumers are choosing to forego the store-bought nut milks altogether, and simply make their own milks at home.
Is it difficult to make nut milk at home?
Quite the contrary! You’ll need to purchase an inexpensive nut milk bag to use, but apart from that, you should have all the other equipment (bowls, a strainer, a measuring cup, and a blender) you need in your kitchen.
 (Credits)
How do I make nut milk at home?
Step #1: Soak your nuts overnight. Place them in a bowl and cover them with an inch of water - you can either leave this bowl to stand on the counter (covered with a cloth!), or in the refrigerator.
Step #2: Drain and rinse your nuts.
Step #3: Combine one part almonds and two parts water in a blender, and blend at the highest speed for two minutes. Be sure to pulse the blender (instead of simply blending continuously), so that you break up the nuts properly.
Step #4: Strain the mixture to get the almond milk out.
Step #5: Deposit the blended nuts into the nut bag, and twist and squeeze it such that you extract all the remaining milk.
Step #6: Sweeten to taste with honey, maple syrup, or other sweeteners.
Step #7: Put the leftover blended nuts aside - these can be added to your morning smoothies, or your baked goods.
Step #8: Enjoy your freshly made, all-natural nut milk!
(Credits)
How do I make nut milk at home?
Step #1: Soak your nuts overnight. Place them in a bowl and cover them with an inch of water - you can either leave this bowl to stand on the counter (covered with a cloth!), or in the refrigerator.
Step #2: Drain and rinse your nuts.
Step #3: Combine one part almonds and two parts water in a blender, and blend at the highest speed for two minutes. Be sure to pulse the blender (instead of simply blending continuously), so that you break up the nuts properly.
Step #4: Strain the mixture to get the almond milk out.
Step #5: Deposit the blended nuts into the nut bag, and twist and squeeze it such that you extract all the remaining milk.
Step #6: Sweeten to taste with honey, maple syrup, or other sweeteners.
Step #7: Put the leftover blended nuts aside - these can be added to your morning smoothies, or your baked goods.
Step #8: Enjoy your freshly made, all-natural nut milk!